
벨로퍼트 리액트 - 7. 리덕스 미들웨어
7-1. 리덕스 프로젝트 준비하기
$ npx create-react-app learn-redux-middleware

$ cd learn-redux-middleware

$ npm add redux react-redux
1) 리덕스 모듈 준비
Ducks 패턴 사용(액션 타입, 액션 생성함수, 리듀서를 한 파일에 작성)
modules/counter.js
// 액션 타입
const INCREASE = 'INCREASE';
const DECREASE = 'DECREASE';

// 액션 생성 함수
export const increase = () => ({type: INCREASE});
export const decrease = () => ({type: DECREASE});

// 초기값
const initialState = 0;

export default function counter(state = initialState, action) {
    switch (action.type) {
        case INCREASE :
            return state + 1;
        case DECREASE :
            return state - 1;
        default :
            return state;
    }
}
루트 리듀서 생성 (modules/index.js)
import { combineReducers } from 'redux';
import counter from './counter';

const rootReducer = combineReducers({ counter });

export default rootReducer;
2) 프로젝트에 리덕스 적용
src 디렉터리의 index.js에서 루트 리듀서를 불러와서 새로운 스토어를 만들고 Provider를 사용해서 프로젝트에 적용하기
src/index.js
import React from 'react';
import ReactDOM from 'react-dom/client';
import './index.css';
import App from './App';
import reportWebVitals from './reportWebVitals';

import { createStore } from 'redux';
import { Provider } from 'react-redux';
import rootReducer from './modules';

const root = ReactDOM.createRoot(document.getElementById('root'));

const store = createStore(rootReducer);

root.render(
  <React.StrictMode>
    <Provider store={store}>
      <App />
    </Provider>
  </React.StrictMode>
);

reportWebVitals();
3) 프리젠테이셔널 컴포넌트 준비
components/Counter.js (number, onIncrease, onDecrease 를 props로 받아온다)
import React from "react";

function Counter({ number, onIncrease, onDecrease }) {
    return (
        <div>
            <h1>{number}</h1>
            <button onClick={onIncrease}>+1</button>
            <button onClick={onDecrease}>-1</button>
        </div>
    );
}

export default Counter;
4) 컨테이너 만들기
containers/CounterContainer.js
import React from "react";
import { useDispatch, useSelector } from "react-redux";
import Counter from "../components/Counter";
import { decrease, increase } from "../modules/counter";

function CounterContainer() {
    const number = useSelector(state => state.counter);
    const dispatch = useDispatch();

    const onIncrease = () => {
        dispatch(increase());
    };
    const onDecrease = () => {
        dispatch(decrease());
    };

    return (
        <Counter number={number} onIncrease={onIncrease} onDecrease={onDecrease} />
    );
}

export default CounterContainer;
App.js에 렌더링
import CounterContainer from "./container/CounterContainer";

function App() {
  return (
    <CounterContainer />
  );
}

export default App;
7-2. 미들웨어 만들어보고 이해하기
1) 리덕스 미들웨어의 템플릿
리덕스 미들웨어를 만들때에는 다음과 같은 형태의 템플릿을 사용한다.
const middleware = store => next => action => {
	// 하고싶은 작업...
}

// 화살표가 여러개지만 function 을 사용하여 작성한다면 다음과 같이 이해할수있다
function middleware(store) {
  return function (next) {
    return function (action) {
      // 하고 싶은 작업...
    };
  };
};
- store : 리덕스 스토어 인스턴스. dispatch, getState, subscribe 등 내장함수가 들어있다.
- next : 액션을 다음 미들웨어에게 전달하는 함수. next(action) 과 같은 형태로 사용한다. 만약 다음 미들웨어가 없다면 리듀서에게 액션을 전달한다. next를 호출하지 않을 경우 액션이 무시되어 리듀서에게로 전달되지 않는다.
- action : 현재 처리하고 있는 액션 객체
리덕스 스토어에는 여러 개의 미들웨어를 등록할 수 있으며 새로운 액션이 디스패치 되면 첫번재로 등록한 미들웨어가 호출된다. next(action)을 호출할경우 다음 미들웨어로 액션이 넘어가고, store.dispatch를 사용하면 다른 액션을 추가적으로 발생시킬 수도 있다.
2) 미들웨어 직접 작성해보기
src/middlewares/myLogger.js
const myLogger = store => next => action => {
    console.log(action); // 액션 출력
    const result = next(action); // 다음 미들웨어 (또는 리듀서)에게 액션을 전달
    return result; // 여기서 ㄴ반환하는 값은 dispatch(action)의 결과물이 된다. 기본값은 undefined;
};

export default myLogger;
3) 미들웨어 적용하기
스토어에 미들웨어를 적용할때는 applyMiddleware 사용. ⇒ src/index.js 수정
import React from 'react';
import ReactDOM from 'react-dom/client';
import './index.css';
import App from './App';
import reportWebVitals from './reportWebVitals';

import { applyMiddleware, createStore } from 'redux';
import { Provider } from 'react-redux';
import rootReducer from './modules';
import myLogger from './middlewares/myLogger';

const root = ReactDOM.createRoot(document.getElementById('root'));

const store = createStore(rootReducer, applyMiddleware(myLogger));

root.render(
  <React.StrictMode>
    <Provider store={store}>
      <App />
    </Provider>
  </React.StrictMode>
);

reportWebVitals();
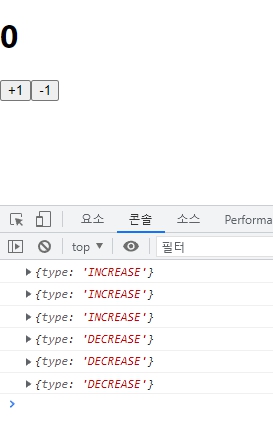
콘솔창에 액션의 이름이 출력된다
4) 미들웨어 수정하기
src/middlewares/myLogger.js 수정
액션이 리듀서까지 전달되고 난 후의 새로운 상태를 확인하기
const myLogger = store => next => action => {
    console.log(action); // 액션 출력
    const result = next(action); // 다음 미들웨어 (또는 리듀서)에게 액션을 전달

    // 업데이트 이후의 상태 조회
    console.log('\\t', store.getState()); // \\t는 탭 문자

    return result; // 여기서 ㄴ반환하는 값은 dispatch(action)의 결과물이 된다. 기본값은 undefined;
};

export default myLogger;
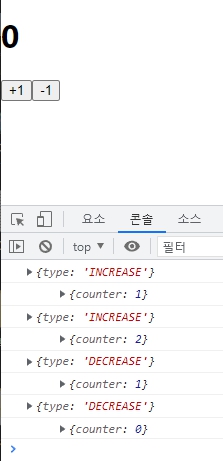
액션과 액션이 전달된 이후 스토어의 상태를 확인할 수 있다
⇒ 위와 같이 리덕스 관련 값들을 콘솔에 로깅하기 쉽게 해주는 미들웨어 ⇒ redux-logger